Deep Image now fully integrated with Zapier. Quick Guide for your first Zap.
How to quickly integrate almost any application with Deep-Image.ai using Zapier.

Zapier were among the first pionieers, who effectively helped people with no or little coding skills to integrate various tools with each other. Since the founding of a company in 2012, they went a very long way and now it's easier than ever.
In the world we live in, where everything is connected with everything, features like those offered by Zapier, are not only needed, but simply necessary.
How to integrate an app with Deep-Image.ai using Zapier?
Below we will go through an easy, step by step guide on creating your first integration.
- Of course you need to have an account on Zapier, Deep Image and every other app you intend to integrate. Make sure you have access to all the apps before you start, it will make the process much smoother. You really don't want to look for activation email to finish an account setup, while having a Zapier page opened and the integration made mid way.
- In the Zapier Dashboard, click on New Zap and you should see the screen below:
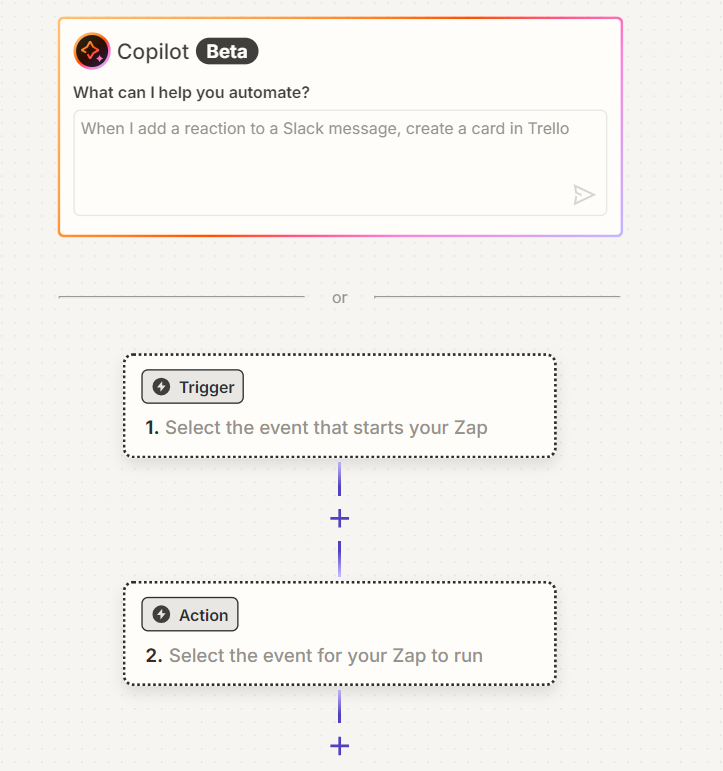
As you can notice, there is a big Copilot Assistant in Beta. I am encouraging you to use it. It's always easier to get some steps done by the Copilot, even if it happens that you might need to correct something afterwards, it will be faster and easier to correct one thing, than to make the whole Zap from scratch. I wrote there a simple text:
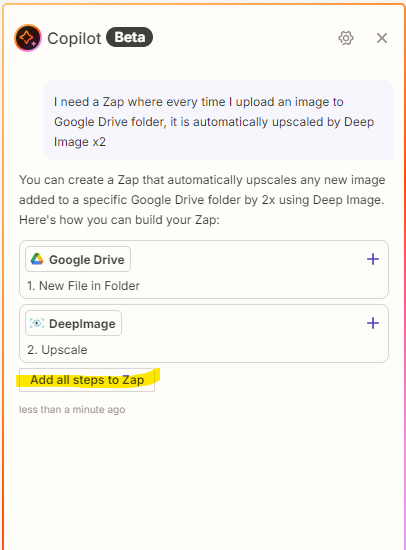
I need a Zap where every time I upload an image to Google Drive folder, it is automatically upscaled by Deep Image x2
3. Once the steps are generated for you, just click "Add all steps to the Zap":
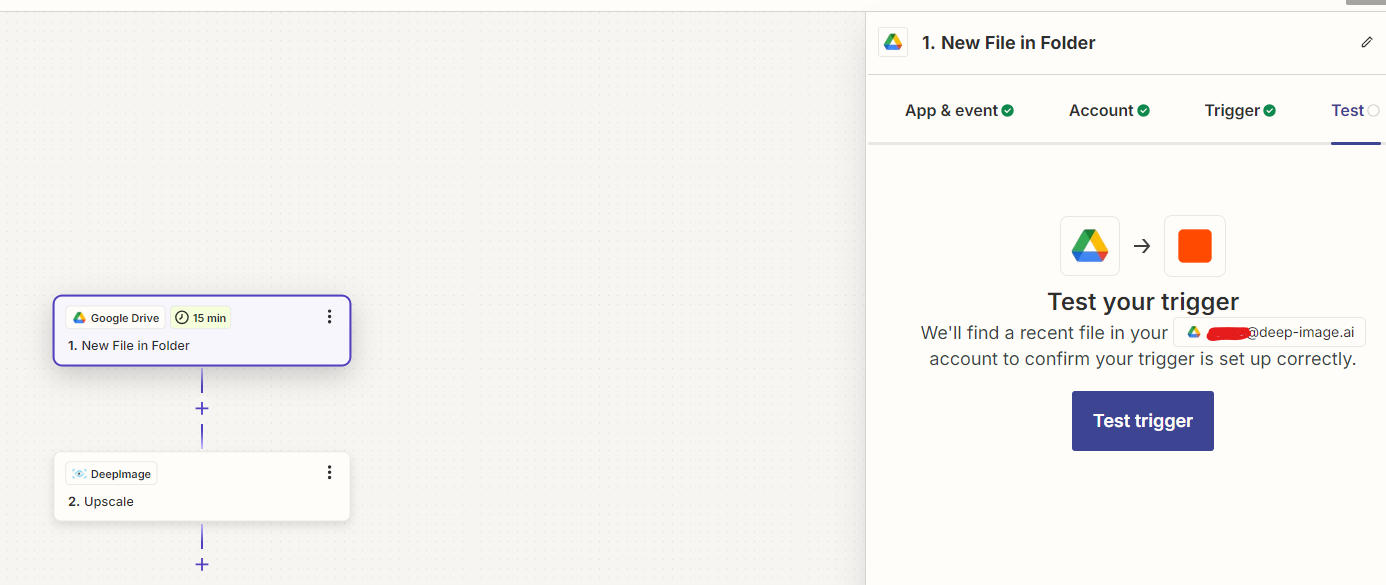
4. Fine tunning the setup - with all steps introduced, it's now time to fine tune little details, go through each step, make sure it's configured correctly, see if it connects with the 3rd party, check if the logic reflects your intentions. And once all that is done, click on the "Test trigger" button.
5. Publishing the Zap. Once your tests go well and everything works as expected, you can proceed and publish your Zap. It will be now live and work continuously until you pause/stop or delete it.
Start Zapping your integrations immediately below
It's easy to do, practical and will save you hours of manual labour, that nobody want's to really do. Like media management, workflows etc.
