How to use Make to integrate Photo Enhancements with other tools?
Reading this step by step instruction will teach you how to easily integrate, upscale, auto-enhance or remove backgrounds from images in the automated way with the help of Make.

If you are not a developer and have no knowledge of coding, then this guide is for you! Reading this step by step instruction will teach you how to easily integrate, upscale, auto-enhance or remove backgrounds from images in the automated way with the help of Make.
What is Make and what is it useful for?
In the simple terms, Make is a platform that allows to easily integrate various tools with each other with no code knowledge required. Those integrations can have triggers and actions that can come together to create an automated process for something. It can be helpful when optimizing work related processes, or even for some hobbyist who do some repetitive tasks. Similiar application to Make is Zapier, which we will talk about in a separate article.
How to integrate Google Drive with Deep-Image through Make?
Today, for the sake of making an easy to follow example integration, we will connect Google Drive with Deep-Image.ai and each time a new photo will be uploaded to a specific folder on my Google Drive, the Deep-Image AI will auto-enhance the image.
Step 1. Create accounts on Make and on all platforms you want to integrate together.
You can create an account in Make here with just a few clicks and benefit from a special discount. There is a free tier allowing to do about 100 operations per month. Of course you will also need an account in Deep-Image.ai, which also can be created for free (10 free credits also through API). If your application of choice for integration is Google Drive, you need an account there prepared ahead to make the whole process smooth.
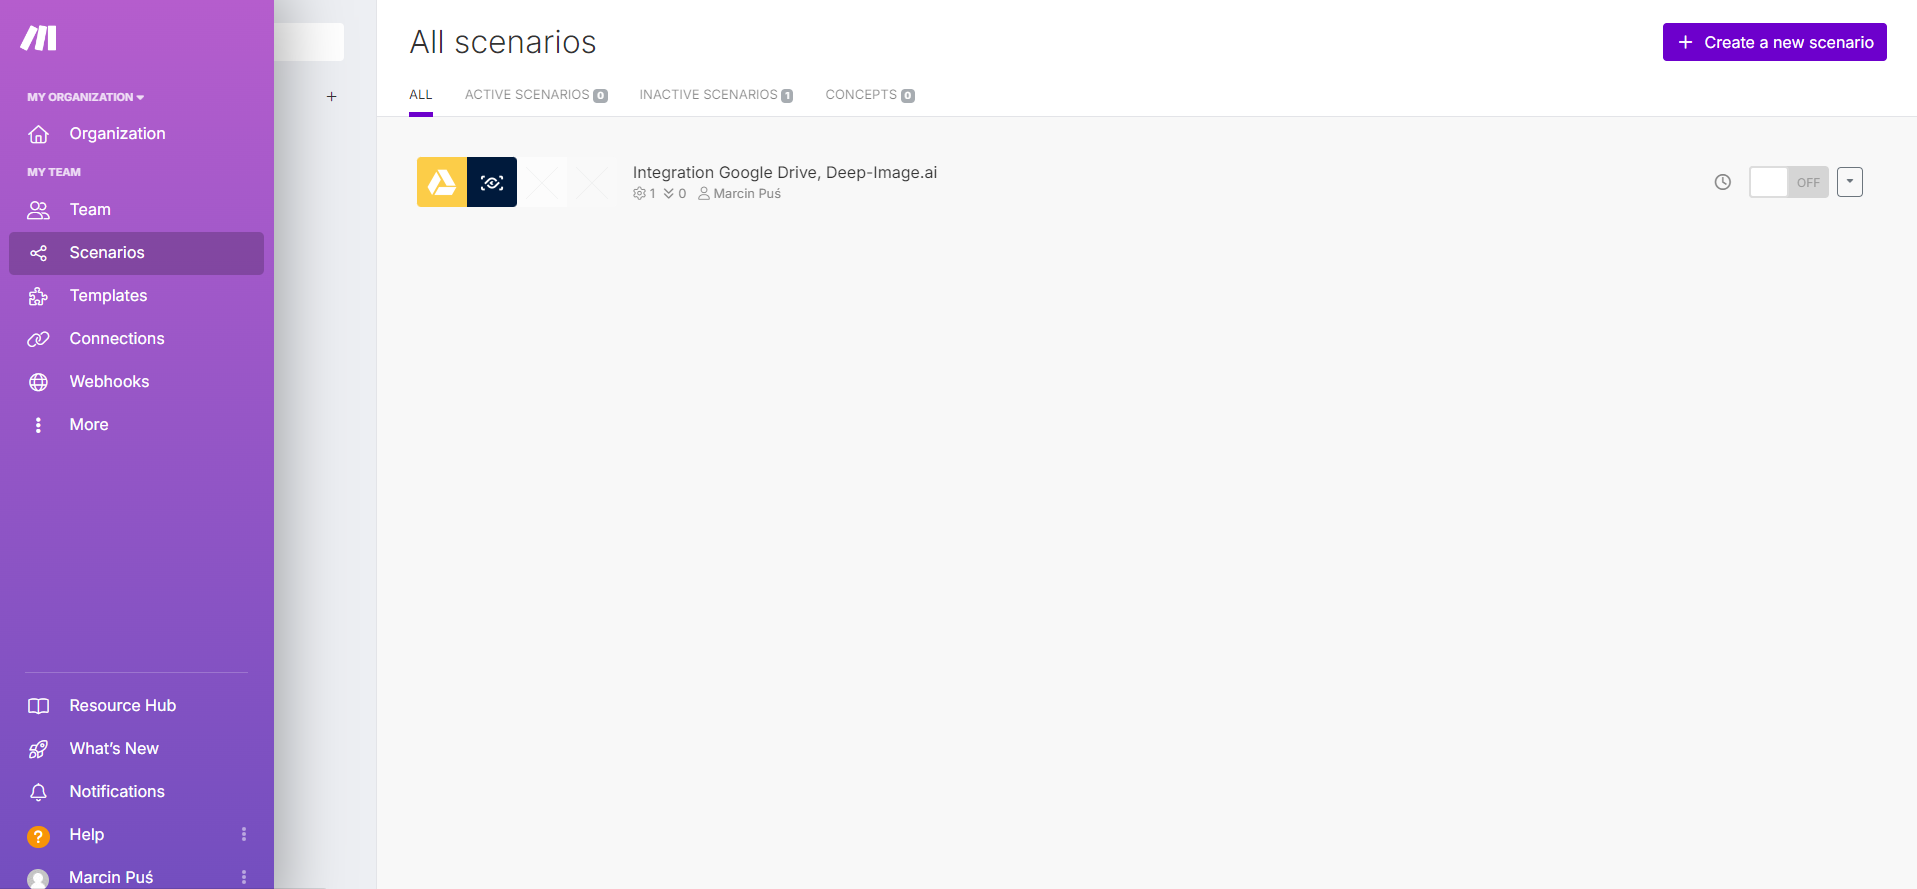
Step 2. Open Scenarios, +Create new scenario
After creating a new scenario you will be greeted with a screen that looks like the one below:
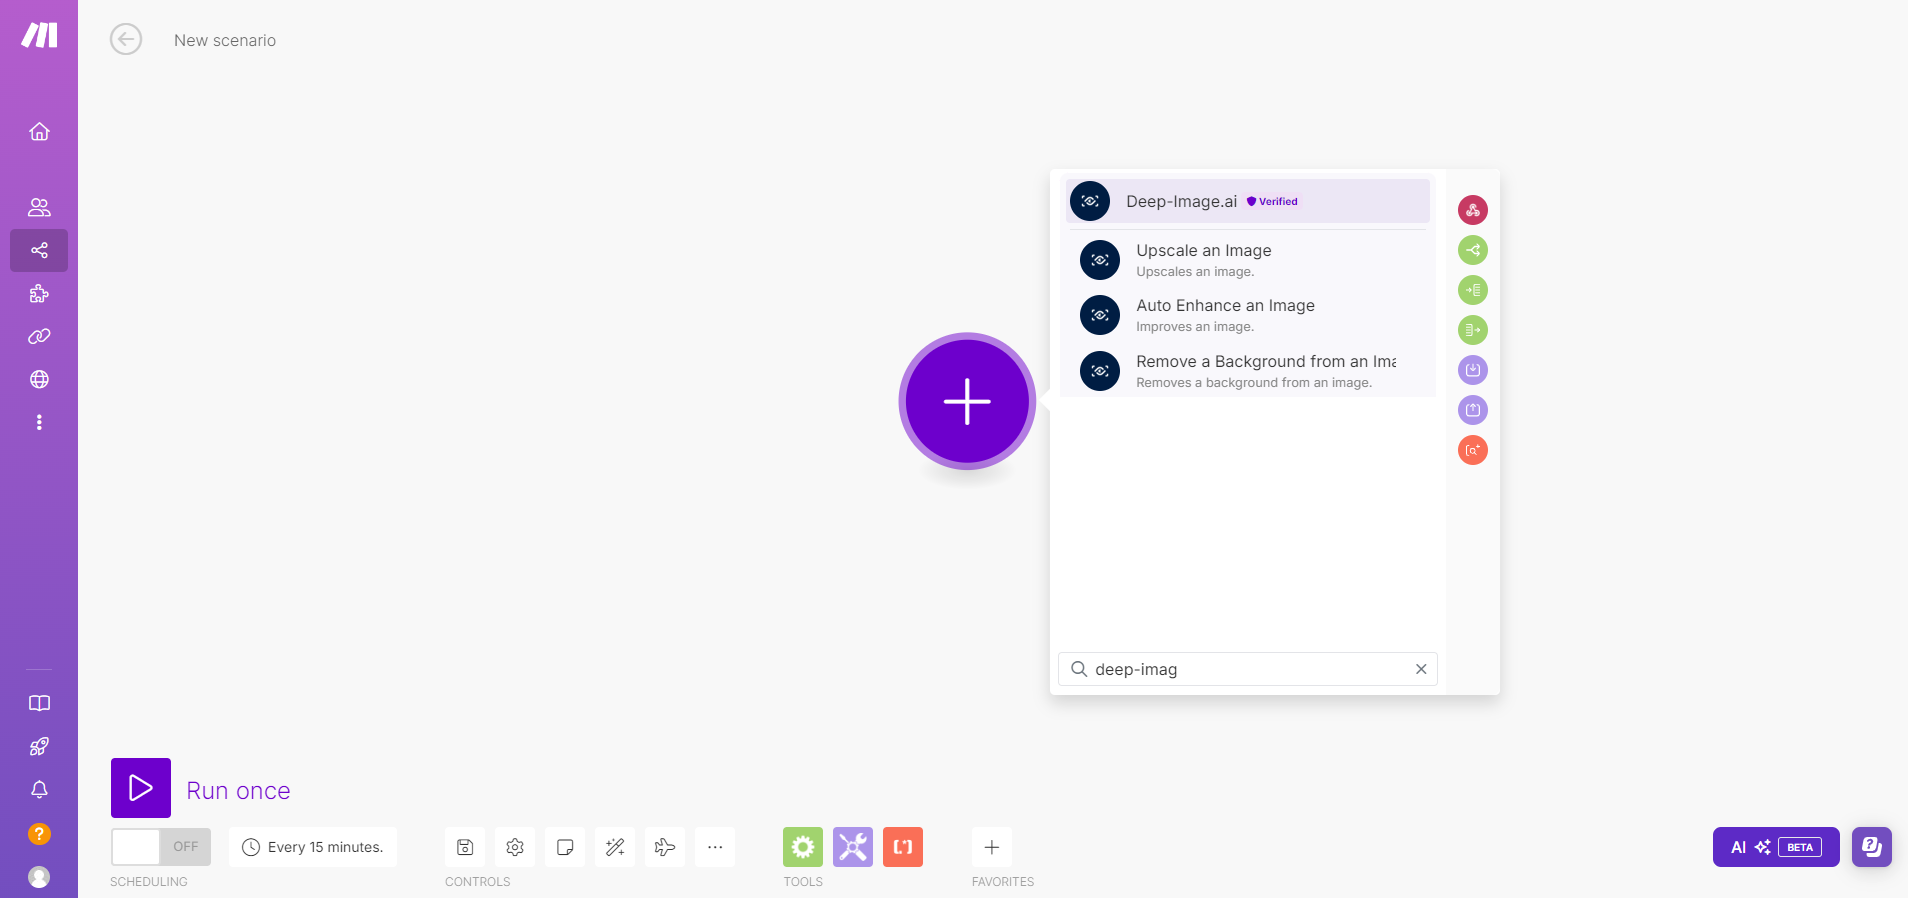
After clicking on a + in a circle, you can pick the starter application. Use the search bar to quickly find the one you need. As our workflow will auto-enhance all new images added to a specific Google Drive folder. We will start from adding here Google Drive application and setting the right conditions. Look for Google Drive Upload File module:
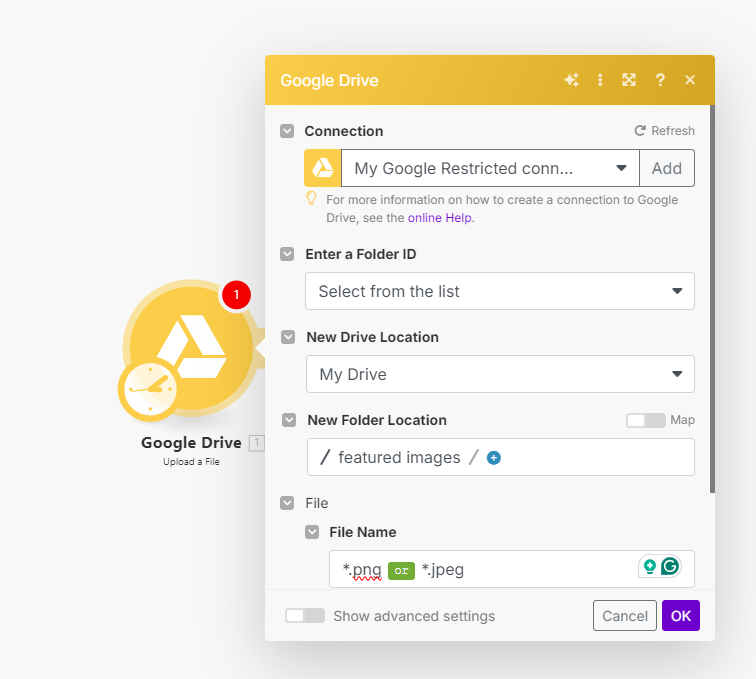
In here we have set it up so each time there is a new file uploaded to a folder "Featured Images" and it's a image type file, then it will start the flow. And in a moment we will set the next steps of that flow.
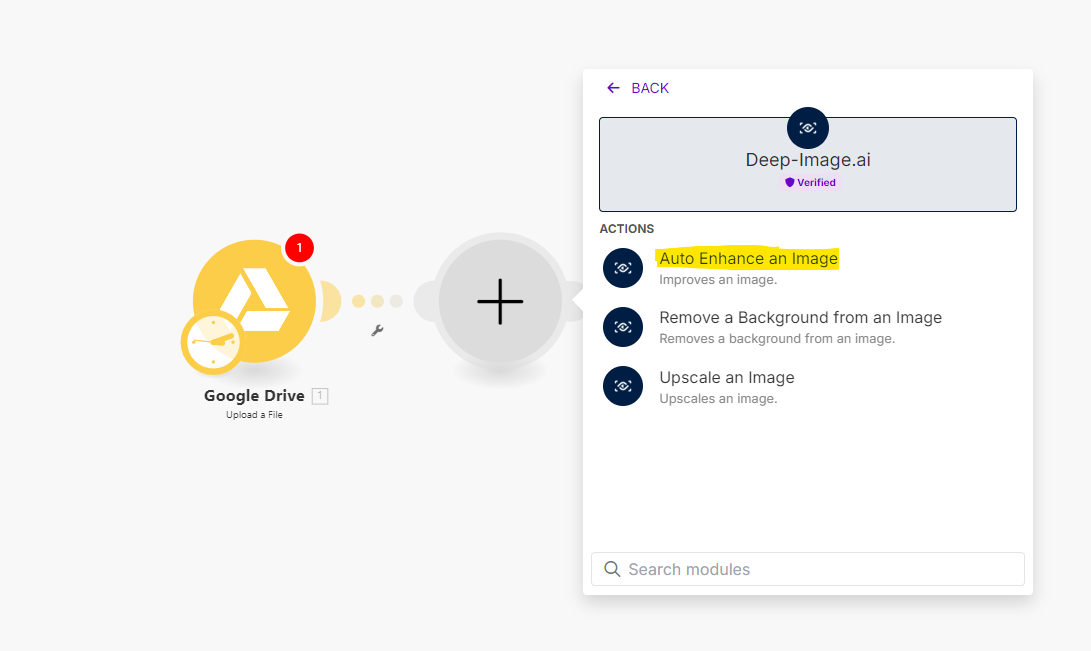
Step 3. Integrating the flow with Deep-Image.ai Auto Enhance feature
Once you have the Google Drive (upload file) added and set, click on the smaller circle on the right-hand side of it. It will allow you to add a second module that will be a continuation of the flow. Here we will choose of course Deep-Image.ai with it's famous Auto Enhance feature. To fully set up Deep-Image.ai as a module in Make. You will need to add an API Key when asked. You will find it in Your Profile under API Settings. Connect Deep-Image.ai with the flow and set the file data to URL, which Deep-Image API can then process.
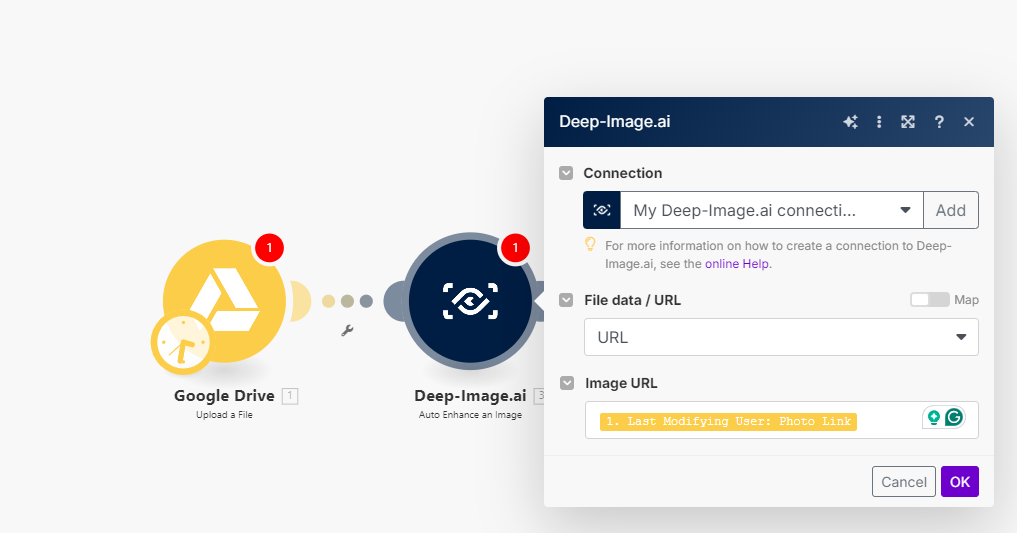
After you set everything the way you like, click OK. And long story short, your integration is nearly done already. After setting it up, please remember to Save your scenario using a button on the bottom of the screen.
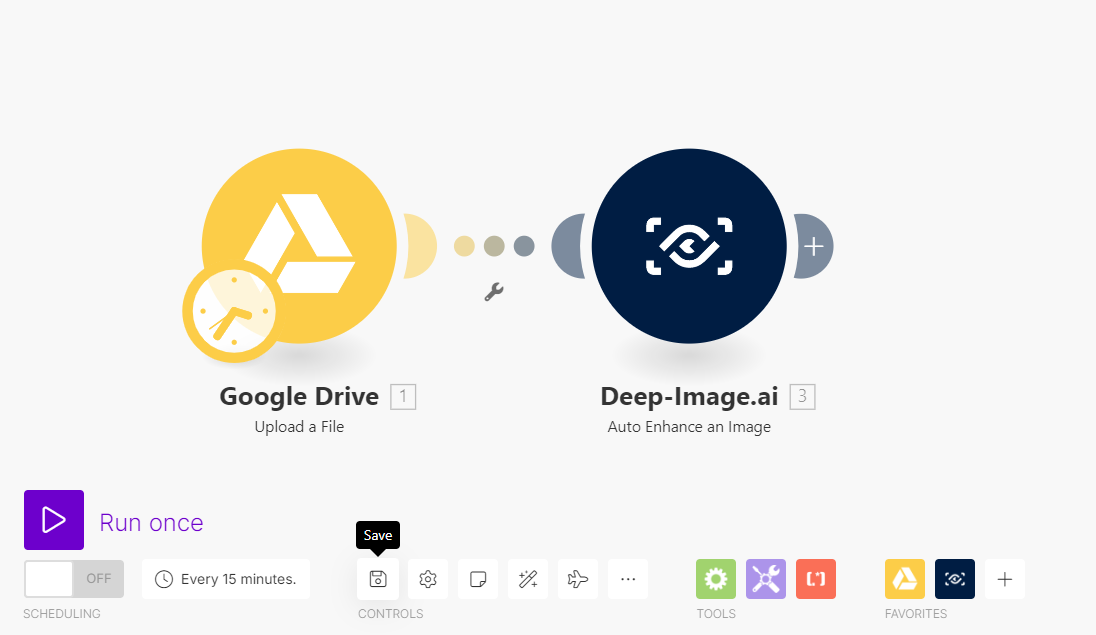
Once saved, you will be able to use this integration from now on with no extra setup needed. You can now set up some extra details, like press play to run it once and see if it works 100% the way you want, and schedule it to make it redo the task every X minutes. You can create a few smaller integrations/scenarios and connect them with bigger ones. All that and no code knowledge required.
Bonus Step. Using AI Assistant when you are stuck with the integration
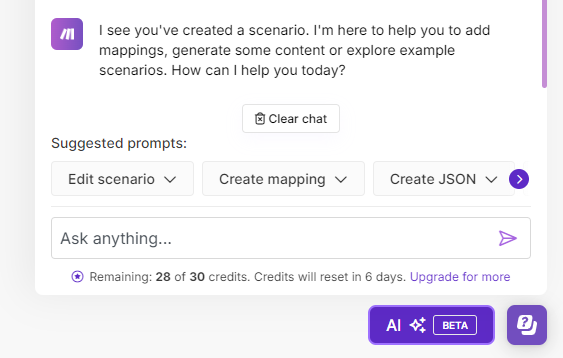
Make provides you with AI assistant during the process of creating a new scenario. It's available in the bottom right corner, and I've got to say that it's the first time that I have used an AI assistant that was actually actively analyzing my setup, what exactly have I written down in the setting options and gave me a smart advice on optimizing the flow and assured me that I am on a good path. This assistant did not only reply to my questions, but also actively helped me set up the right modules. Corrected my mistakes and modified the whole integration to be more aligned with my needs. Really good job by the Make Team on that one. To show it off, let me paste below a description of the integration that was entirely made by their assistant:
The scenario "Integration Google Drive, Deep-Image.ai" is designed to monitor a specific folder in Google Drive for newly created files and then enhance the images found in those files using Deep-Image.ai. Here is a detailed step-by-step explanation:
1. Google Drive: Watch Files in a Folder (id: 1)
Purpose: This module monitors a specified folder in Google Drive for newly created files.
Configuration:
Folder ID: *************
File Types to Watch: All types of files
Limit: Processes 1 file at a time
Connection: Uses the connection labeled "My Google Restricted connection"
Mapper: This module does not have any specific mapping configurations.
2. Deep-Image.ai: Auto Enhance (id: 2)
Purpose: This module takes the image URL from the newly created file in Google Drive and enhances it using Deep-Image.ai.
Configuration:
Connection: Uses the connection labeled "My Deep-Image.ai connection"
Mapper:
Image URL: Mapped from the last modifying user's photo link in the Google Drive file.
Image Source: Set to "url".
Summary
Google Drive Module: Watches a specific folder for new files.
Deep-Image.ai Module: Enhances the images found in the newly created files.
This integration ensures that any new images added to the specified Google Drive folder are automatically enhanced using Deep-Image.ai, streamlining the process of image enhancement.
Soon we will also publish the Zapier integration guide. If needed we will also prepare some video guides, so follow us to stay tuned and receive the helpful content that our customers enjoy.
