Navigating AWS S3 IAM Configuration for Enhanced Deep-image.ai Integration


Deep-image.ai, a cutting-edge platform known for its advanced image processing capabilities, requires meticulous configuration of AWS S3 IAM (Identity and Access Management) for optimal performance. This article provides a step-by-step guide on setting up a user and an existing S3 bucket, specifically for Deep-image.ai, ensuring a seamless and secure integration.

Step 1: Initial Setup
To commence, log into the AWS Console at AWS Console. The journey begins at the IAM section, where user management is centralized. Navigate to Identity and Access Management (IAM) -> Users -> Add users. Here, you will create a new user named "di-test".
Step 2: User Creation and Policy Attachment
Once you're in the IAM user creation section, fill in "di-test" as the username. Select the option to Attach policies directly and proceed to Create policy. This step is crucial as it defines the permissions and roles associated with the user.
Step 3: Policy Configuration
In the policy creation, opt for the JSON tab and paste the following JSON data:
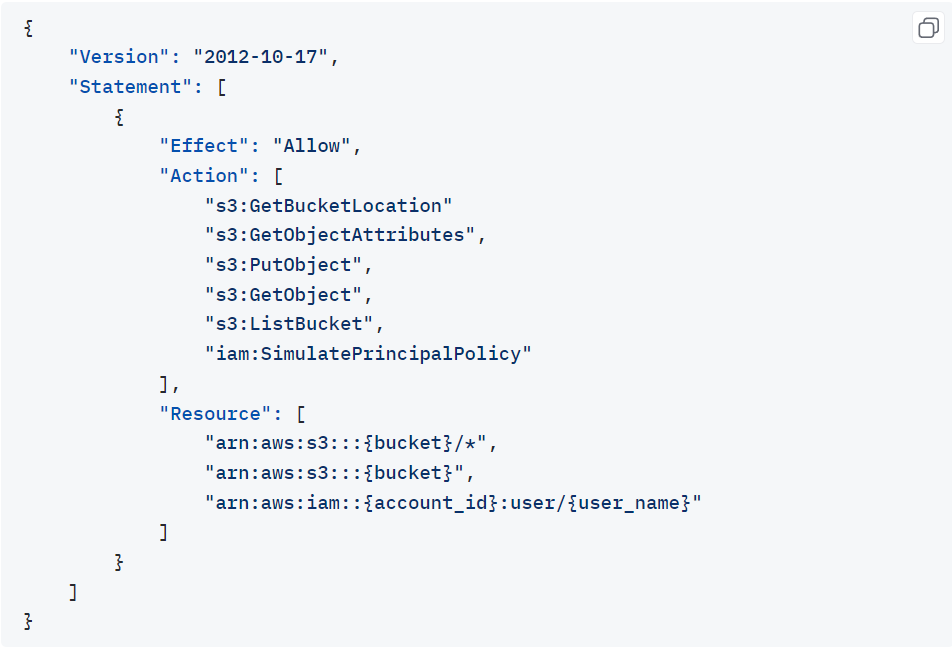
Replace [account_id] with your specific AWS account ID (found in the navigation menu), ensuring there are no dashes. This tailored JSON snippet outlines the permissions necessary for the user "di-test" to interact effectively with the S3 bucket "di-test-bucket".
Step 4: Policy Naming and Assignment
After the JSON data is correctly inputted, name the policy "di-test-policy" and save it. Return to the user creation page, search for "di-test-policy", refresh the page if necessary, and select the policy you just created.
Step 5: Access Keys Generation
Next, click on the "di-test" user and navigate to Security credentials. Here, select Create access key and choose Third-party service. This process will generate an Access key and Secret access key, which are vital for the next steps.
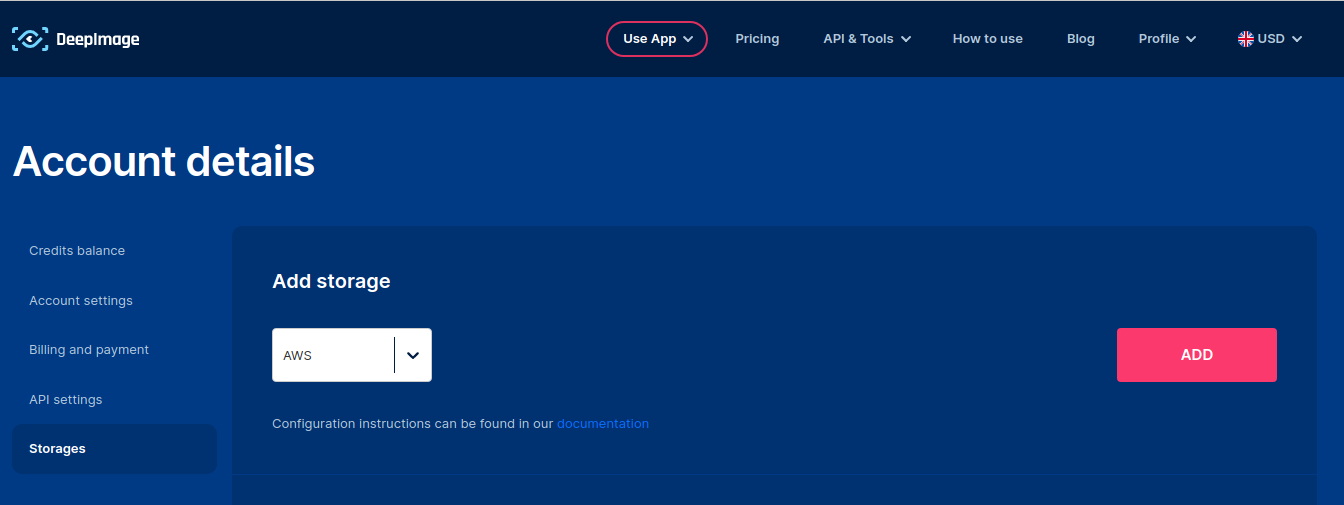
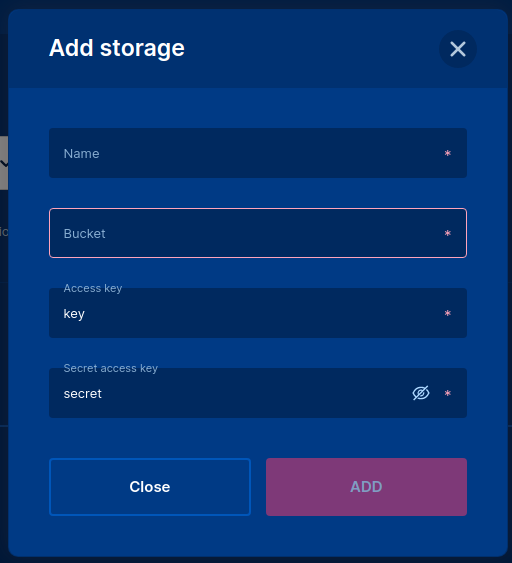
Step 6: Deep-image.ai Storage Configuration
With the Access key and Secret access key in hand, you are now equipped to configure the storage in Deep-image.ai. Create a storage with the name "di-storage", using the bucket name "di-test-bucket" and the keys you've obtained.
Utilizing Your Configured Storage
The final step is integrating this configuration with Deep-image.ai. You can utilize this setup in two key ways:
- Cloud Processing: Use "di-storage" as a source and/or target folder within the Deep-image.ai web application for cloud-based processing.
- REST API Integration: For more advanced users, this storage can be integrated using REST API, specifying the image URL as
storage://di-storage/file.jpg.
Conclusion
This comprehensive guide ensures that your AWS S3 IAM configuration aligns perfectly with Deep-image.ai's requirements, enabling a robust, secure, and efficient environment for all your image processing needs. Whether you are a novice or an expert in cloud configurations, these steps will help you harness the full potential of Deep-image.ai in conjunction with AWS services.
