Beyond Scratch Removal: Context-Aware AI Photo Restoration
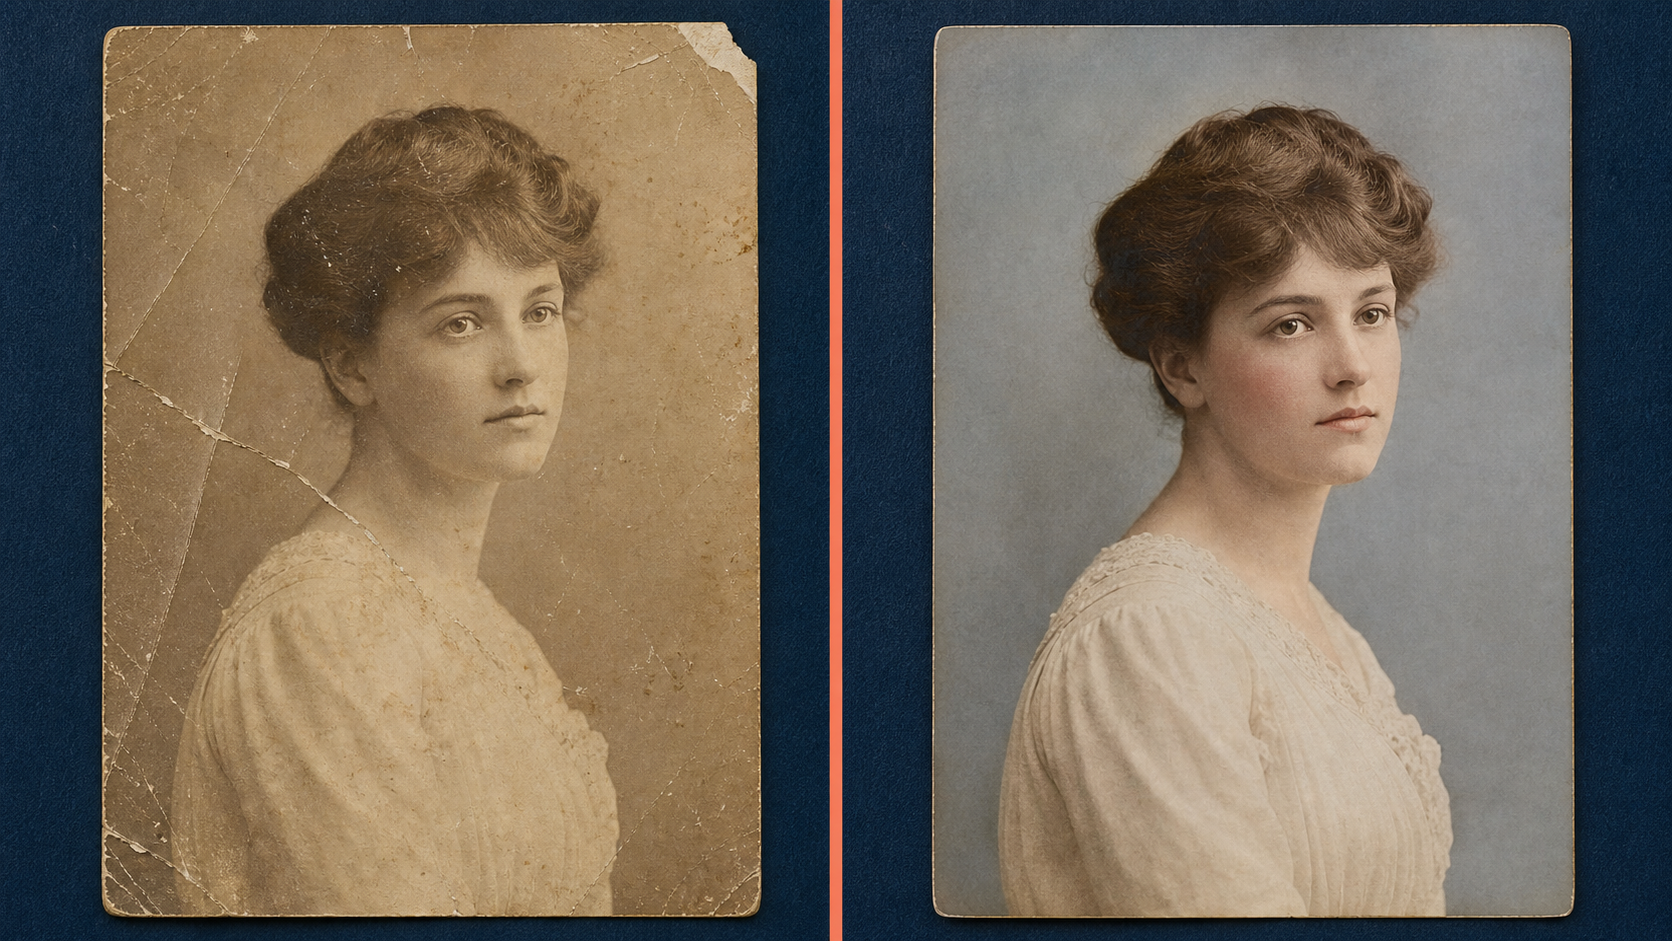
Photo restoration is not the same as making an old image look new. A scratch can be removed without changing the person in the photograph. A missing eye, a blurred inscription, or an invented color is different: the software must infer information that the source no longer contains.
Context-aware restoration can produce convincing repairs because a model considers faces, clothing, architecture, lighting, and surrounding texture. That broader context is useful, but it also creates a responsibility to separate recovered evidence from generated detail. The goal should be a clearer image with an honest record of what changed.
What context-aware restoration means
Traditional filters operate mainly on local pixels. Dust removal detects small outliers. Denoising reduces variation. Sharpening increases contrast around edges. These tools can improve a scan, but they do not understand that a curved edge belongs to an eyelid or that a repeating pattern belongs to lace.
A context-aware model uses learned visual structure to estimate a plausible repair. When part of a face is damaged, it can use the visible eye, head position, skin tone, and facial proportions to fill the missing area. When a street photograph has a torn corner, it may continue a wall, pavement, or window pattern.
The result is an informed reconstruction, not proof of the original pixels. That distinction should guide both the workflow and the language used to describe the output.
Four levels of intervention
1. Capture correction
The safest changes correct the digitization rather than the photograph. They include rotation, crop, white balance, exposure, and lens distortion. If possible, rescan the original at a useful resolution before applying AI. A poor phone photo of a print limits every later step.
2. Surface repair
Dust, small scratches, folds, and isolated spots can often be removed with limited inference. Even here, automatic tools can erase fine jewelry, hair, handwriting, or film grain. Review the repair at full resolution and compare it with the source.
3. Detail reconstruction
Repairing a missing facial feature or a large torn region requires generated content. The model may create something visually consistent, but several different reconstructions could be equally plausible. Treat this version as an interpretation and retain a mask or change log showing the reconstructed area.
4. Colorization and animation
Color and motion add another layer of interpretation. A grayscale photograph usually does not contain enough information to recover exact clothing, eye, or wall colors. Animation invents intermediate poses and expressions. These outputs can be valuable for storytelling, but they should not replace the archival master.
Why the plastic-face effect happens
Older restoration workflows often applied strong denoising before sharpening or upscaling. Skin texture, film grain, and small facial features were treated as noise. The next stage then sharpened the remaining broad shapes, producing smooth skin and hard edges.
A better workflow uses restrained denoising and evaluates faces separately from background texture. Upscaling should not be judged by apparent sharpness alone. Look for changed identity cues: eye shape, teeth, hairline, wrinkles, jewelry, and the boundary between face and hat. If these details drift, reduce the strength or keep the region closer to the source.
A controlled restoration workflow
- Create a preservation master. Save the highest-quality scan in a lossless format and never overwrite it.
- Make a working copy. Correct crop, orientation, exposure, and large color casts first.
- Remove limited damage. Address dust and scratches before asking a model to reconstruct large areas.
- Process faces carefully. Use conservative settings and compare identity-critical features at 100 percent zoom.
- Upscale after cleanup. Enlargement cannot recover evidence that was removed by an aggressive earlier step.
- Review a before/after pair. Use the same crop and scale so the comparison reveals changes instead of hiding them.
- Export derivatives. Keep restored, colorized, and animated versions separate from the original scan.
For a family archive, store the source date, scanner or camera details, known people and locations, and the tools used. For a museum or commercial archive, add operator, workflow version, settings, and a description of reconstructed regions.
How to evaluate a restored result
Begin with factual details. Are signs, uniforms, medals, license plates, or architectural elements still accurate? AI can turn unclear marks into readable-looking but incorrect text. It can also regularize asymmetry that was present in the original person or object.
Then inspect texture. Genuine grain should not become a repeated digital pattern, and skin should not look airbrushed. Check boundaries around hair, glasses, fingers, and clothing. Finally, zoom out. A technically clean result can still feel wrong if contrast, lighting, or depth no longer match the source.
When a damaged area has no reliable reference, consider presenting two outputs: a conservative restoration and a clearly labeled interpretive reconstruction. That is more useful than pretending uncertainty does not exist.
Using Deep-Image.ai for restoration
AI Enhancer Studio can be used to test enhancement and detail recovery on a working copy. For a small or low-resolution scan, AI Image Upscale can create a larger derivative for display or printing. Start with moderate settings, compare the result with the original, and avoid stacking several strong passes.
If the final goal includes motion, restoration should come first. The guide to animating restored vintage photos explains how to prepare a clean source while keeping the still image and animation as separate outputs.
The bottom line
Context-aware AI is useful because it can follow the structure of a scene rather than treating every defect as random noise. The same capability can also invent convincing details. A good restoration workflow protects the original, uses the least aggressive intervention that solves the problem, and records where interpretation begins.
The strongest before/after is not the most dramatic one. It is the version that improves readability while preserving identity, material texture, and historical uncertainty.
