AI Headshots: Why Over-Editing Damages Authenticity
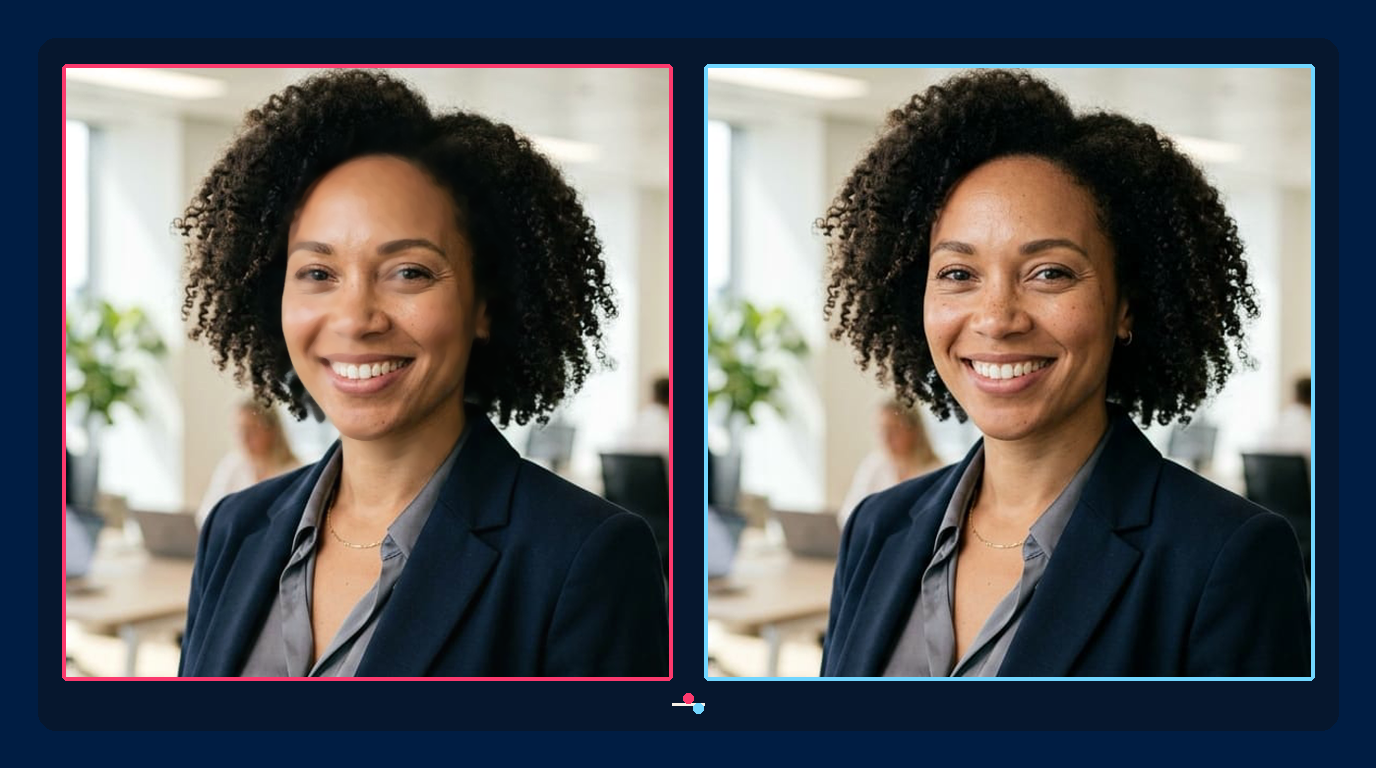
An AI headshot can be technically polished and still be a poor professional portrait. Perfectly smooth skin, repeated hair texture, symmetrical features, hard cutout edges, and synthetic studio light may produce a striking thumbnail, but they can also make the person difficult to recognize.
The objective is not to prove that no AI was involved. It is to create a current, professional likeness that still looks like the person colleagues, clients, or recruiters will meet.
Recognition matters more than flawlessness
Professional profile images perform a practical identity function. LinkedIn's guidance says that a profile photo needs to be a likeness or headshot of the member. Its broader profile accuracy guidance connects truthful representation with trust on the platform.
A headshot can fail that test without becoming a completely different face. Small changes to eye shape, jaw width, smile, age, hairline, freckles, or skin tone may be enough to make the portrait feel unfamiliar. Heavy retouching can also remove the details people use for recognition.
Signs of an over-processed headshot
- skin has one uniform texture across cheeks, forehead, and neck;
- both sides of the face appear unnaturally mirrored;
- teeth and eye whites are brighter than the scene can support;
- hair strands merge into repeated patterns or dissolve into the background;
- glasses, earrings, buttons, or collar edges change shape;
- the head and clothing have a halo from poor compositing;
- background blur, face light, and cast shadows come from different directions;
- the portrait changes age, expression, or characteristic facial asymmetry.
These defects are easiest to miss on a phone-sized preview. Always inspect the final crop at full resolution and at the small size used by the profile.
Start with representative source photos
Choose recent, sharp photographs that show the person's current appearance. Include useful variation in angle and expression, but avoid mixing images from very different ages, hairstyles, facial hair, or body changes unless the tool explicitly lets you select which appearance to preserve.
Good inputs have:
- clear eyes and facial boundaries;
- natural skin texture without beauty filters;
- several angles rather than many near-duplicates;
- consistent current identity details;
- enough resolution to inspect hair, glasses, and clothing edges.
Do not use another person's portrait as a facial style reference. Describe lighting, crop, wardrobe, and background separately from identity.
Define identity invariants
Before generating or editing, list the features that must stay stable:
- face proportions, eye shape, nose, mouth, jaw, and characteristic asymmetry;
- skin tone, freckles, moles, lines, and age;
- hairline, curl pattern, facial hair, and glasses;
- expression and visible accessibility or cultural details.
A useful instruction is specific: “Preserve identity, age, natural facial asymmetry, freckles, skin texture, hairline, and glasses. Change only the background and jacket.” Avoid requests such as “make me flawless,” which give no boundary between correction and redesign.
Our image-editing prompt guide uses a four-part structure: preserve, change, method, and avoid.
Make lighting and background believable
A plain wall, real office, or restrained studio sweep usually supports a professional portrait better than an elaborate generated environment. The background should not compete with the face or imply a workplace, role, or location that is untrue.
Check that the face, clothing, and background share one light direction and compatible color temperature. Watch for impossible rim light, inconsistent shadows around the neck, and blur that cuts through hair or glasses.
Natural does not mean careless. Exposure, white balance, crop, and minor temporary blemishes can be corrected while preserving texture and identity.
Retouch in small, controlled steps
Separate the work into reversible stages:
- select the strongest representative source;
- correct crop, rotation, exposure, and white balance;
- remove temporary distractions conservatively;
- adjust wardrobe or background only if needed;
- apply restrained sharpening at the final output size;
- compare the result with the source and an in-person likeness.
If an output is close but the skin is too smooth, correct that one issue rather than generating a completely new face. Keep accepted intermediate versions so you can return to the last faithful result.
Review the details generators often change
Compare source and result side by side. Inspect:
- pupil direction, eyelids, eyebrows, and catchlights;
- teeth count and shape;
- earrings, glasses hinges, and frame symmetry;
- hair boundaries and curl continuity;
- collar, lapels, buttons, jewelry, and hands if visible;
- skin texture across face and neck;
- whether the person still looks the same age.
Ask someone who knows the subject to review the portrait. A technically clean image can still miss likeness in a way that an automated similarity score overlooks.
Choose the right workflow
If you already have a strong photograph, enhancement and background cleanup may be safer than generating a new portrait. Use the Enhancer Studio for technical cleanup or a dedicated Business Photo Generator when a new professional setting is required.
Keep the source file and review every generated option. Do not publish a portrait merely because it is the most glamorous result. Select the one that best preserves the person.
A practical headshot checklist
- Does the image look like the person now?
- Are identity, age, skin tone, hair, glasses, and characteristic features preserved?
- Does skin retain believable variation and texture?
- Are lighting, shadows, cutout edges, and background physically consistent?
- Are clothing and accessories free from generated defects?
- Does the portrait remain credible at profile size and full resolution?
The strongest professional headshot is not the one with the fewest human details. It is the one that presents a recognizable person clearly, confidently, and without turning their face into a generic template.
